Similar like Cocoapods or Carthage, you can use Swift Package Manager to manage the dependencies in your Cocoa project.
With the latest Xcode 11, there is now a native support for Swift Package Manager for you to use it directly in your project.
🔗Adding a new package
To add a new package with Swift Package Manager is really easy. Go to the following Xcode's menu:
File > Swift Packages > Add Package Dependency...
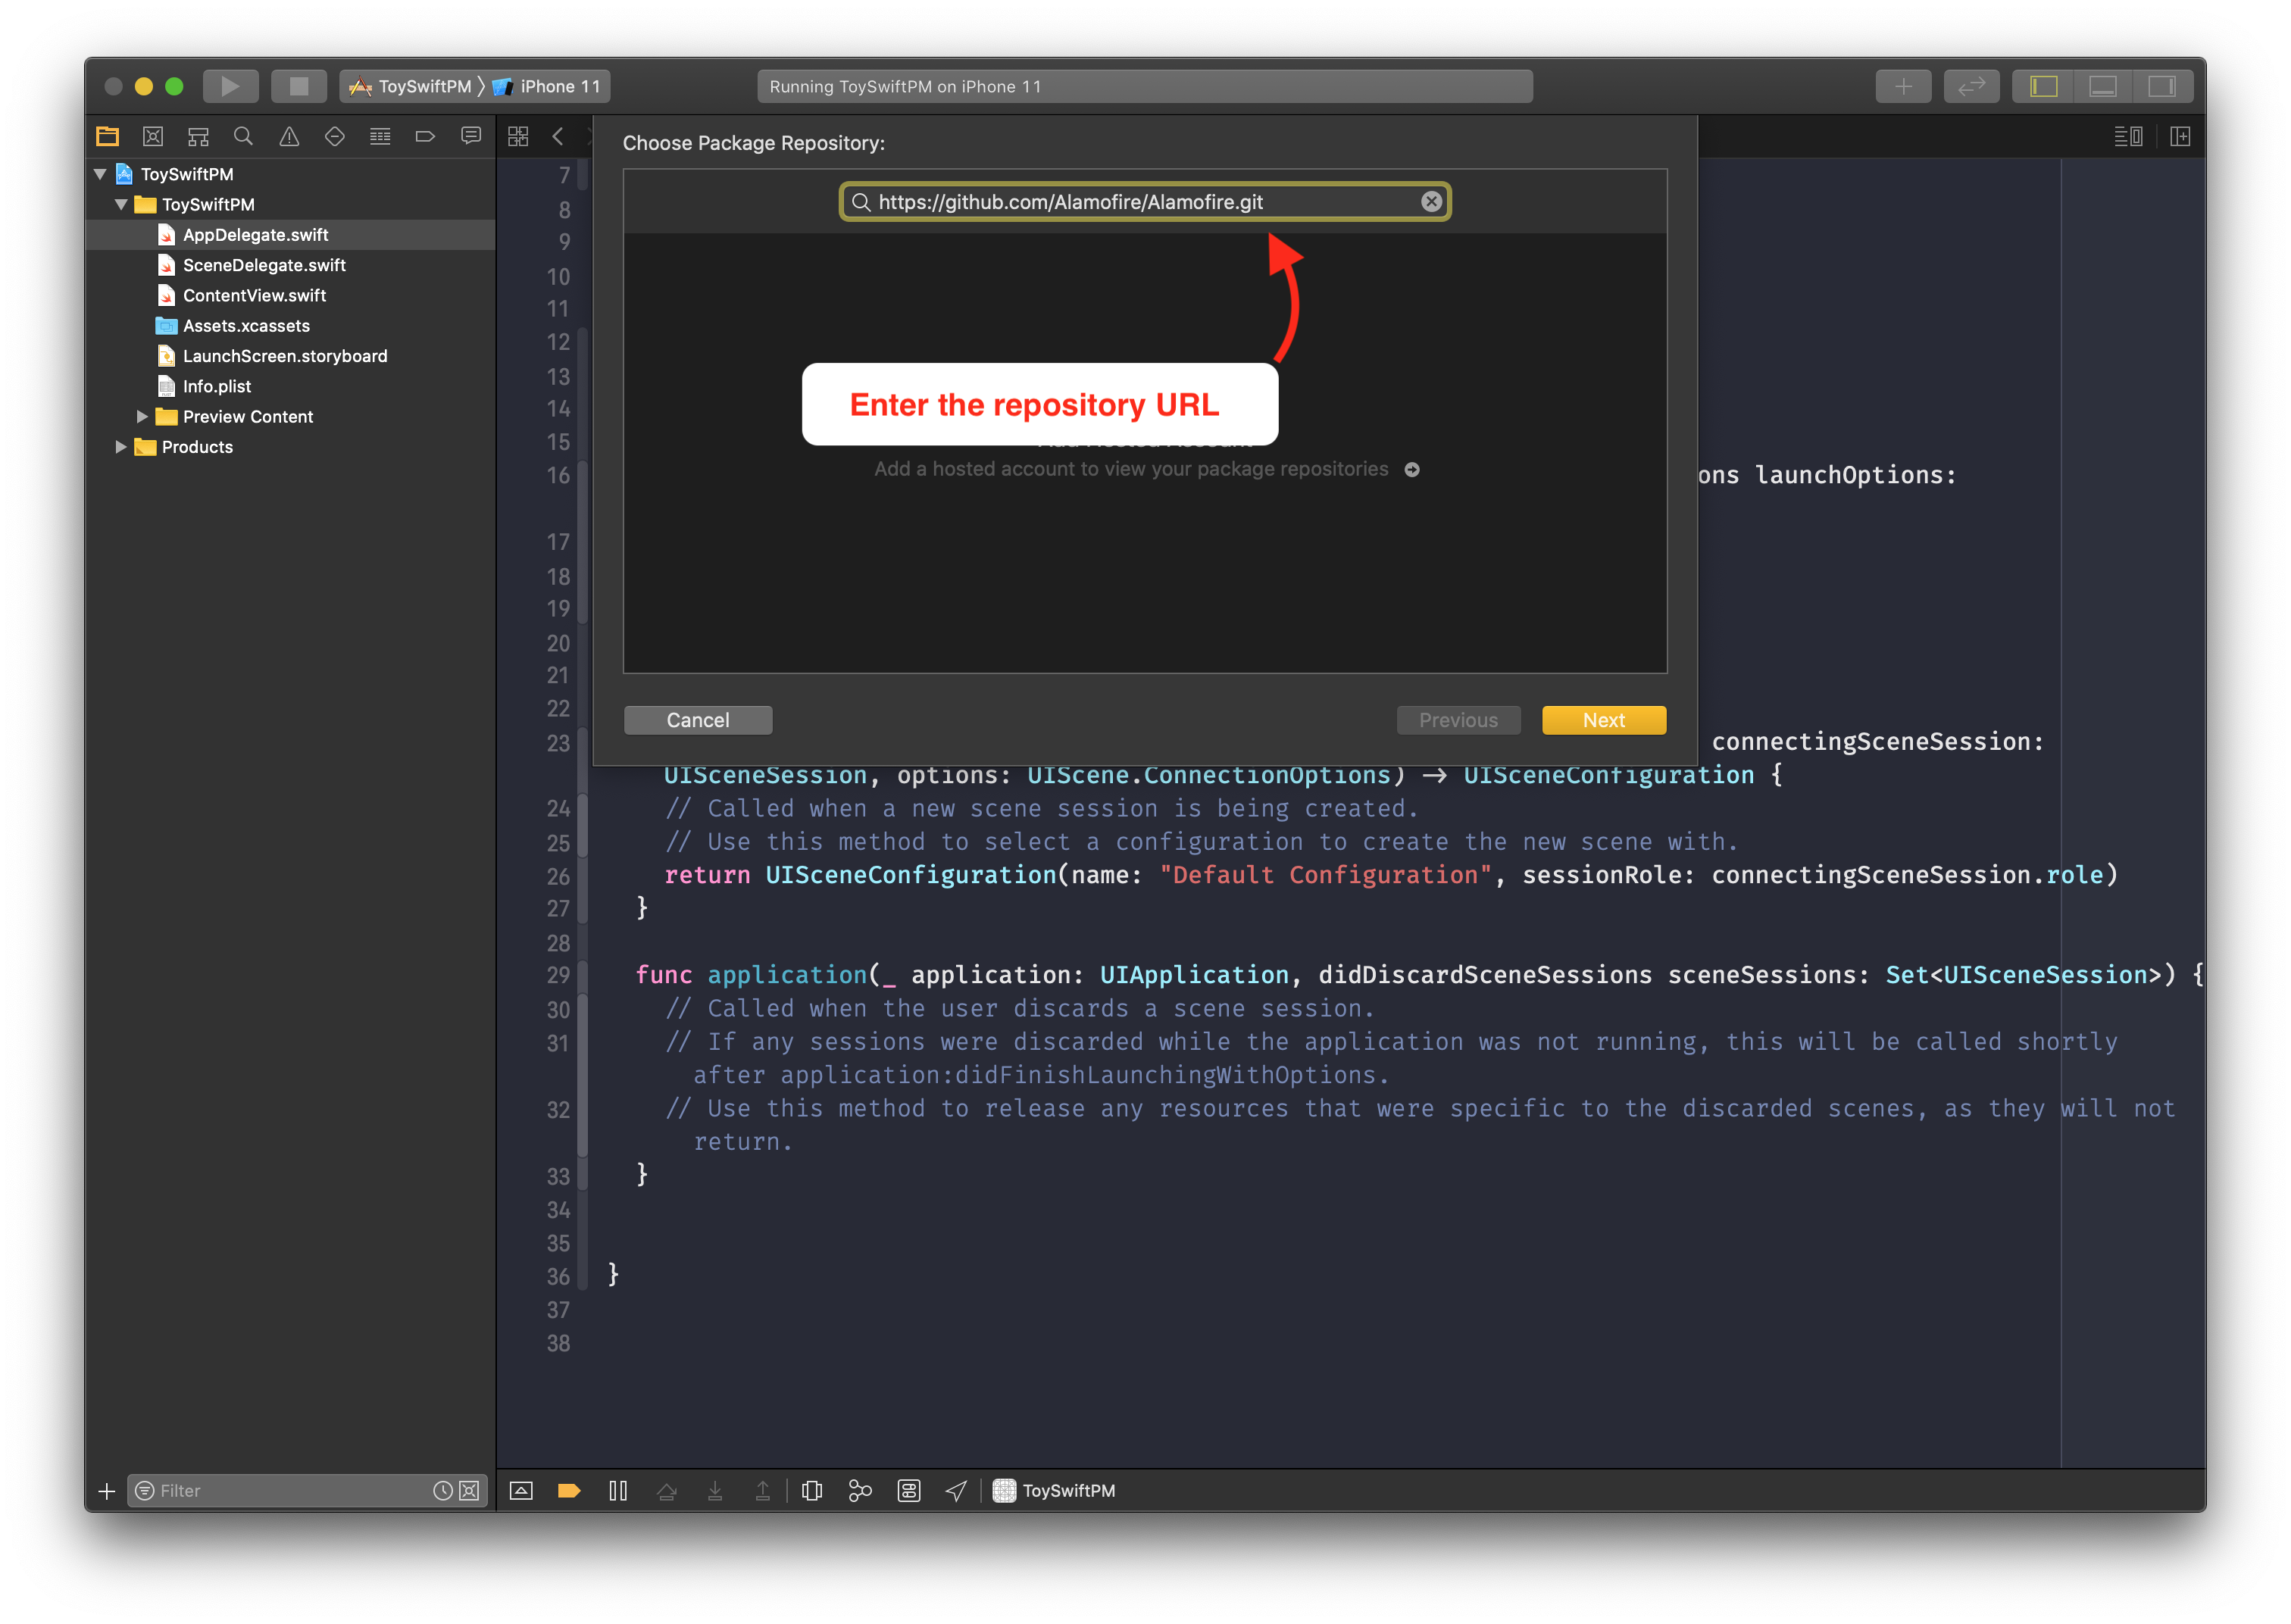
and add the package's repository URL. That's it.
For example, to add Alamofire library you just have to add https://github.com/Alamofire/Alamofire.git in the search field.

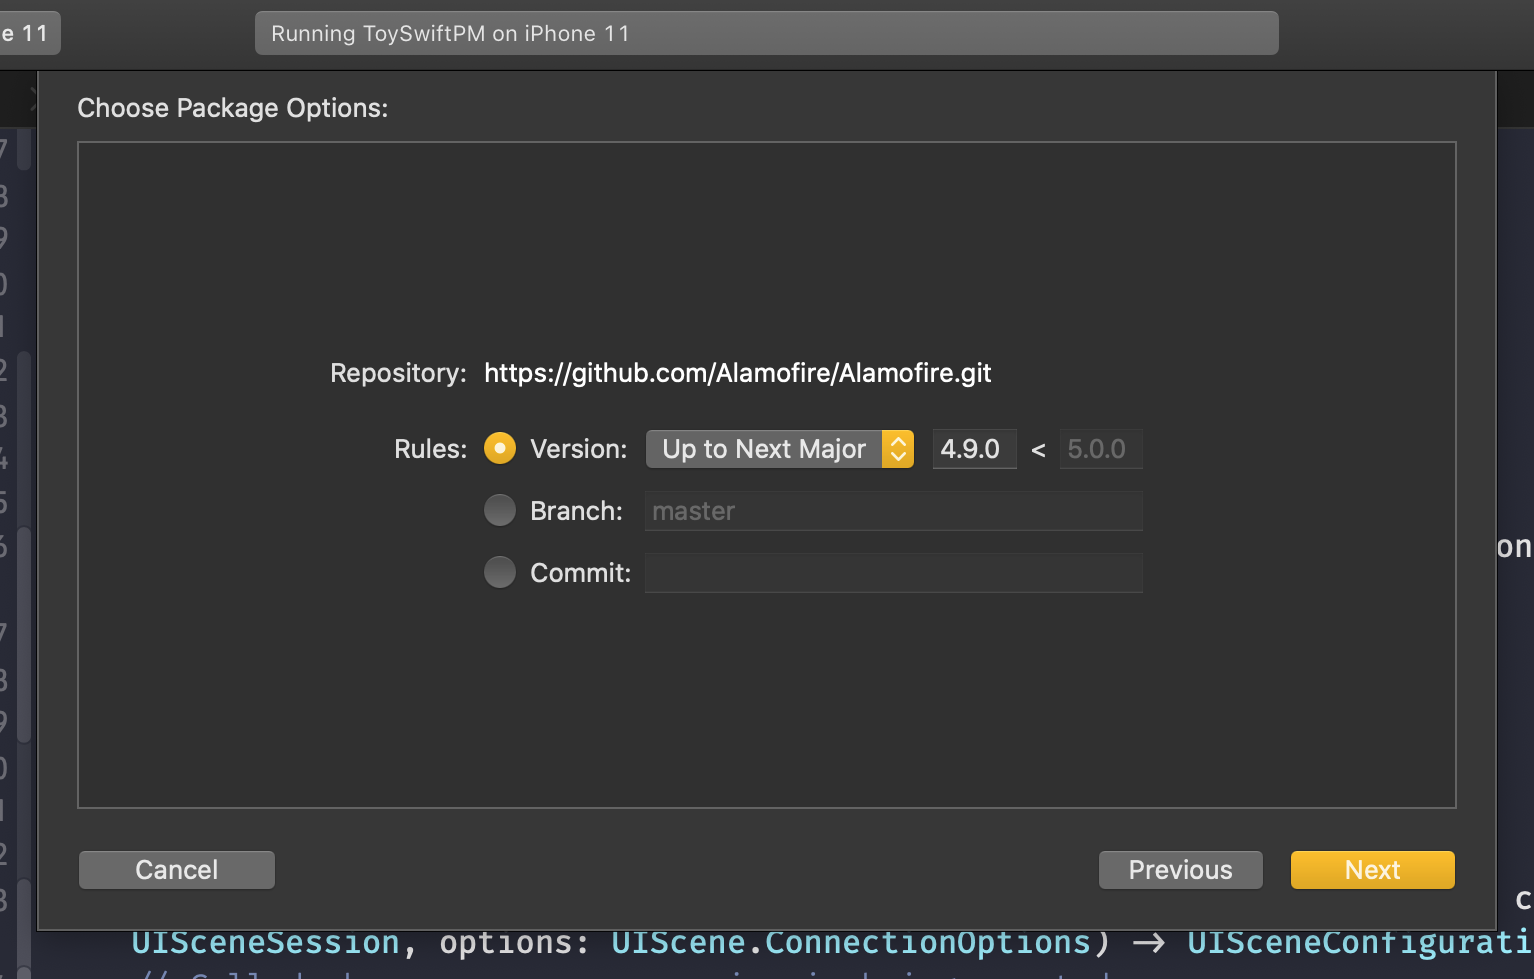
You then will have the option to configure the package based on the version, branch or even commit.

Once you have chosen the package target, you will noticed the newly added package at the bottom of Xcode's Project Navigator. Now, you can import the package as usual.
🔗Removing a package
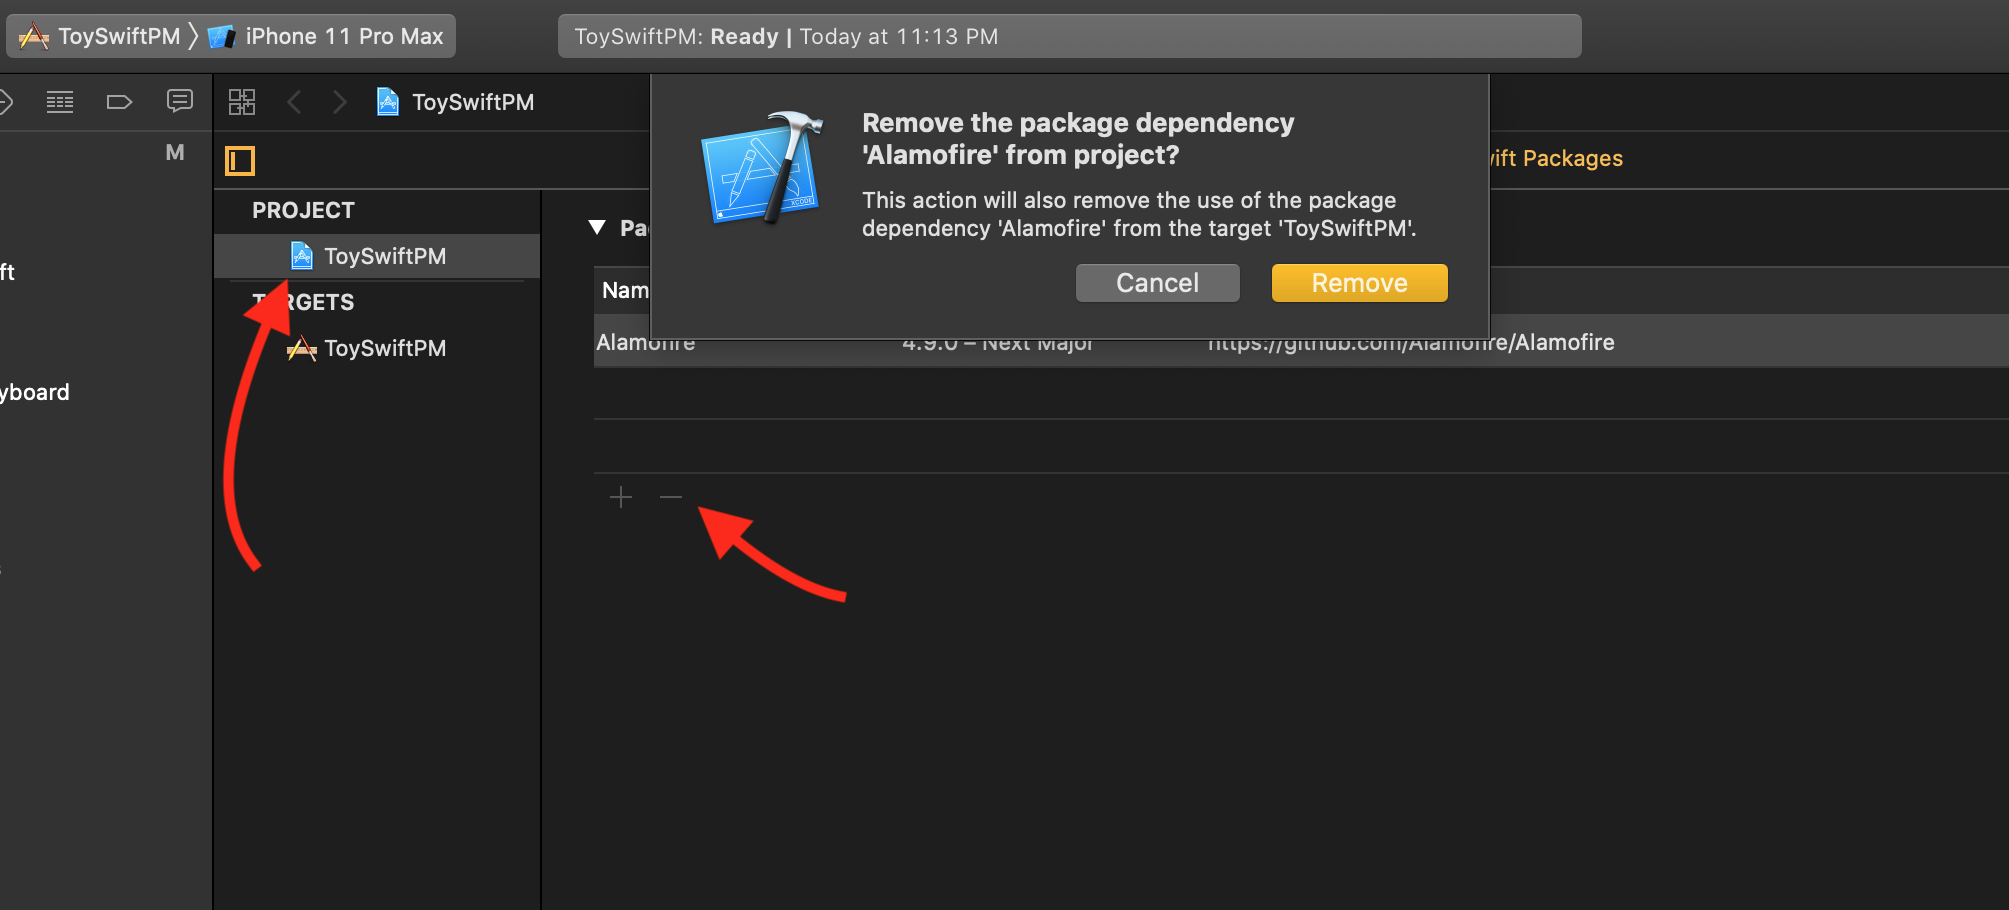
To remove a package is easy too. Navigate to your project settings and you will noticed that there is a new section called Swift Packages. Navigate to it, click on your library and click on the minus button below to remove it.

🔗Caveats
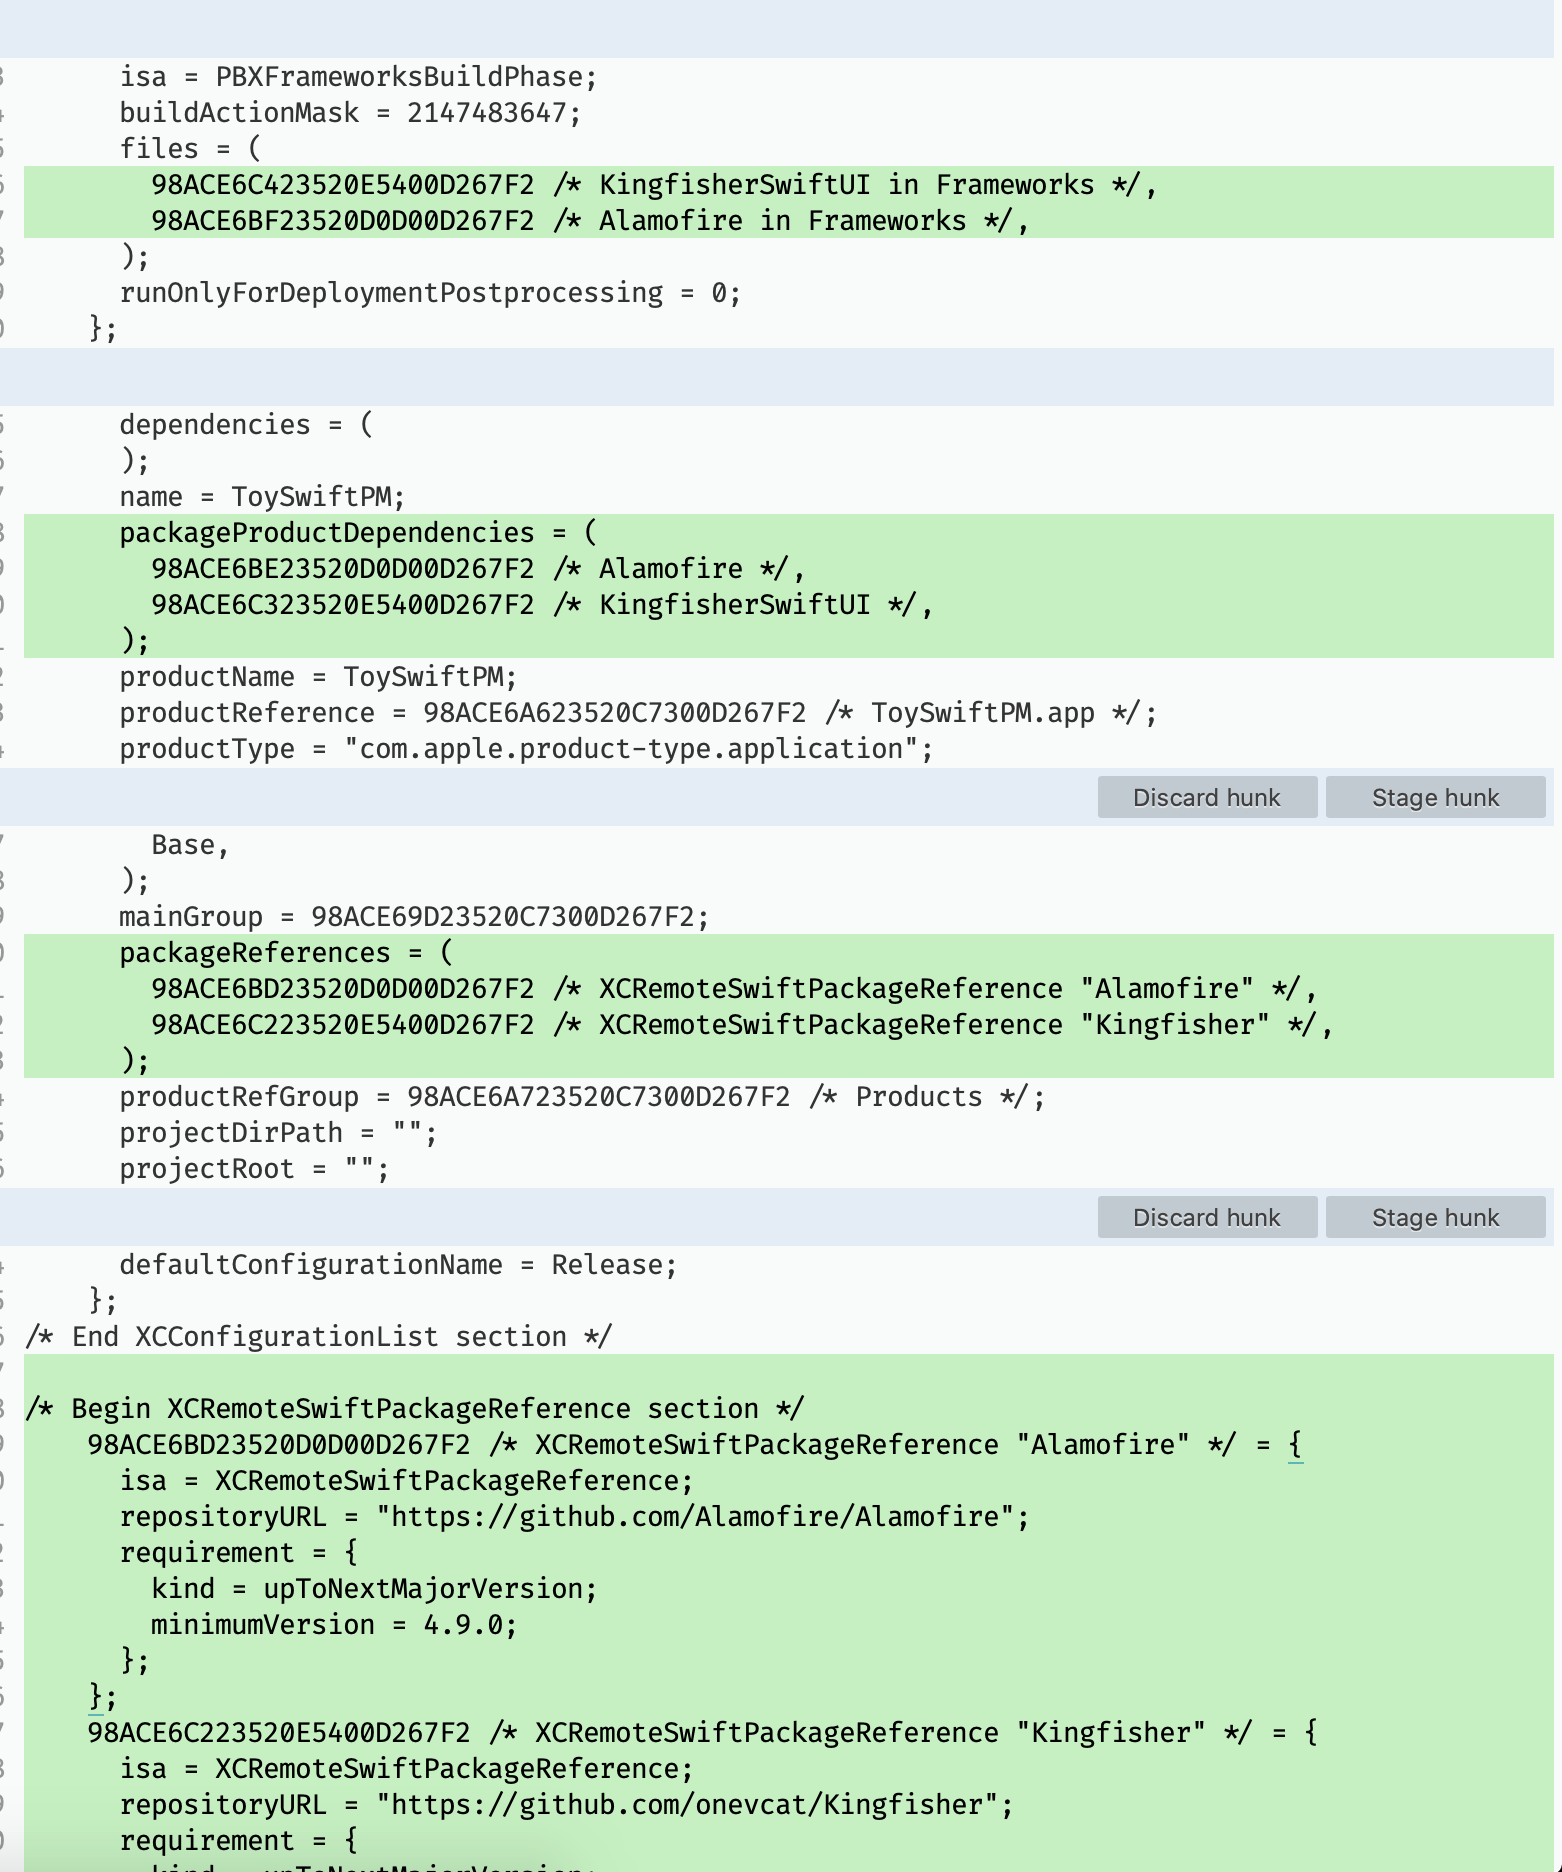
From my limited understanding of how it works, I was expecting Swift Package Manager to create a Package.swift file but instead it creates a references of the package in .xcodeproj file.

Based on my experience of how painful it is to solve a merge conflict in .xcodeproj file, this is definitely something that I probably would think twice before using it in a team project. Otherwise, using Swift Package Manager is really easy.
Hey, no rubygems dependencies is already a plus! 😉